Step 1: Create a page and add the content.
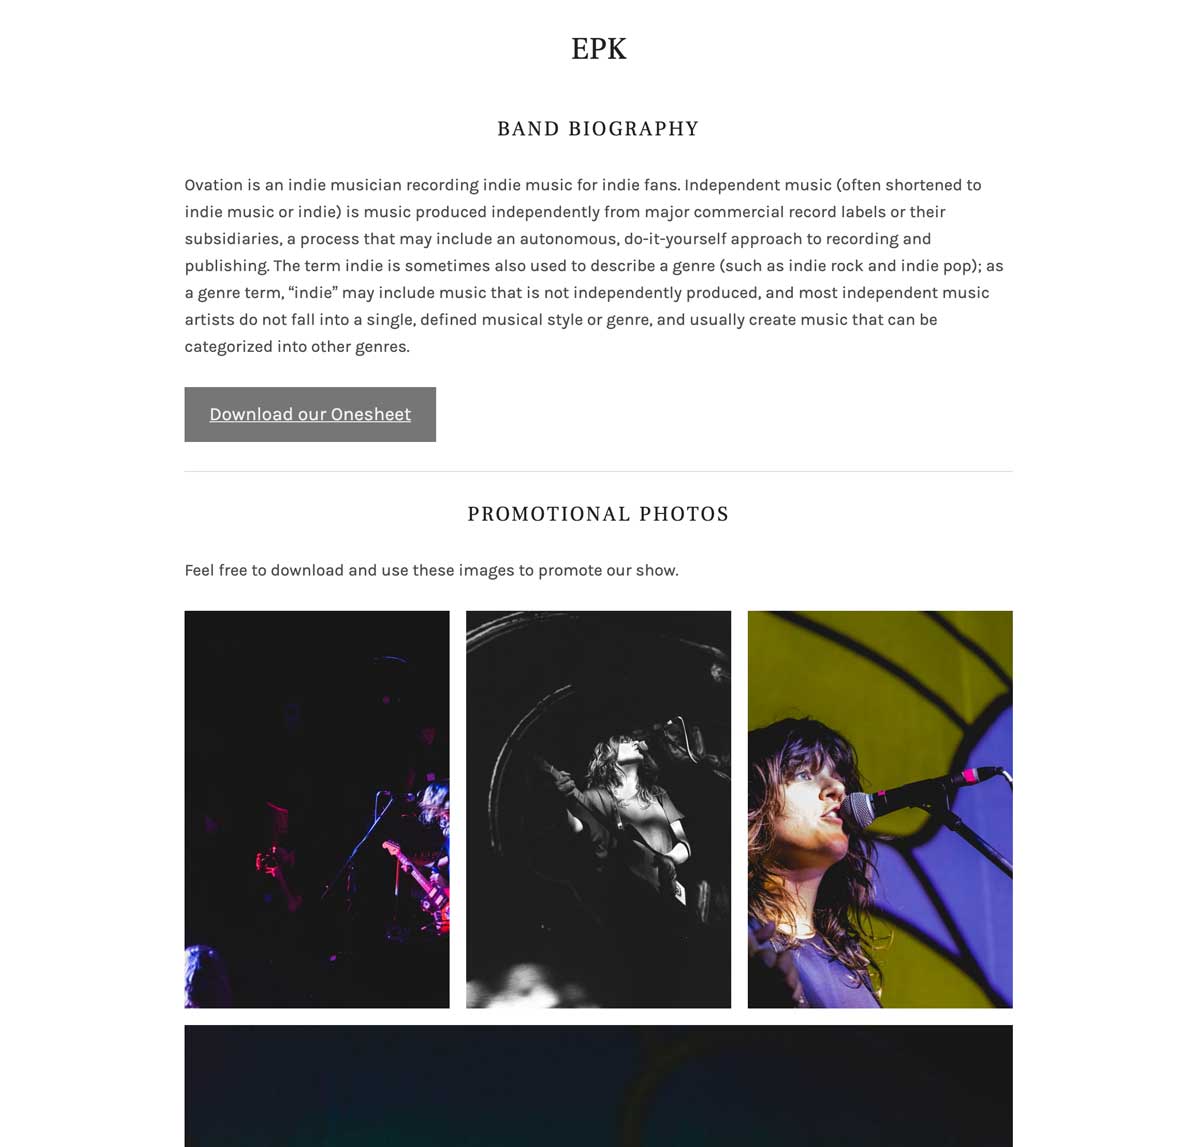
I’ll be using our Ovation theme to create an EPK for this demo. You can see the final product of this tutorial here. I’ll start by creating a new page called EPK and adding the content I want. I’ll include:
- Brief bio
- One sheet download
- High quality photos
- A playlist of live recordings
- Videos of live shows
- Reviews from booking agents
- Contact form
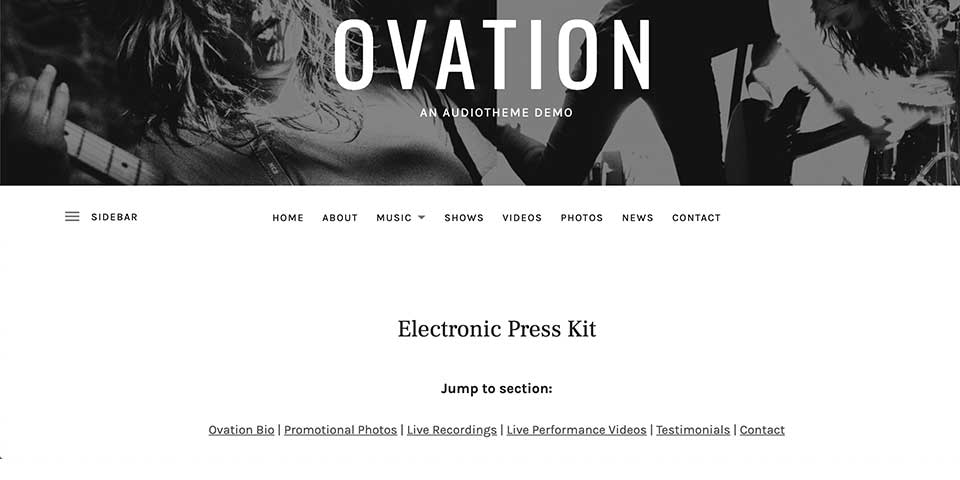
As you can imagine, adding all of this content will make the EPK page long. So long that someone coming to visit it may not even know exactly what all is included on the page. Adding anchor links to the page and navigation will help with the page’s organization and usability.
Step 2: Create your anchor links for each section
In the demo, I’ve used a spacer block and separator block to break the sections up.
Once you’ve created your page sections in the Gutenberg editor, you can add anchors to each of them.
An anchor link allows you to hyperlink directly to that section of the page. You create an anchor link to any element with an id attribute. Usually you’ll add the id attribute to an h2 heading. If you add a heading in Gutenberg, then look in the “Advanced” panel in the Block Settings sidebar, you’ll see a field for adding an “HTML Anchor” there. There’s also a link with some useful information that’s worth exploring.
Keep in mind that anchor text and links do have some impact on SEO. Moz recommends that anchor text be succinct, relevant, not generic, and not overly keyword heavy.
For our demo, I’ll add the HTML anchor to the heading for the Band Biography section.
bio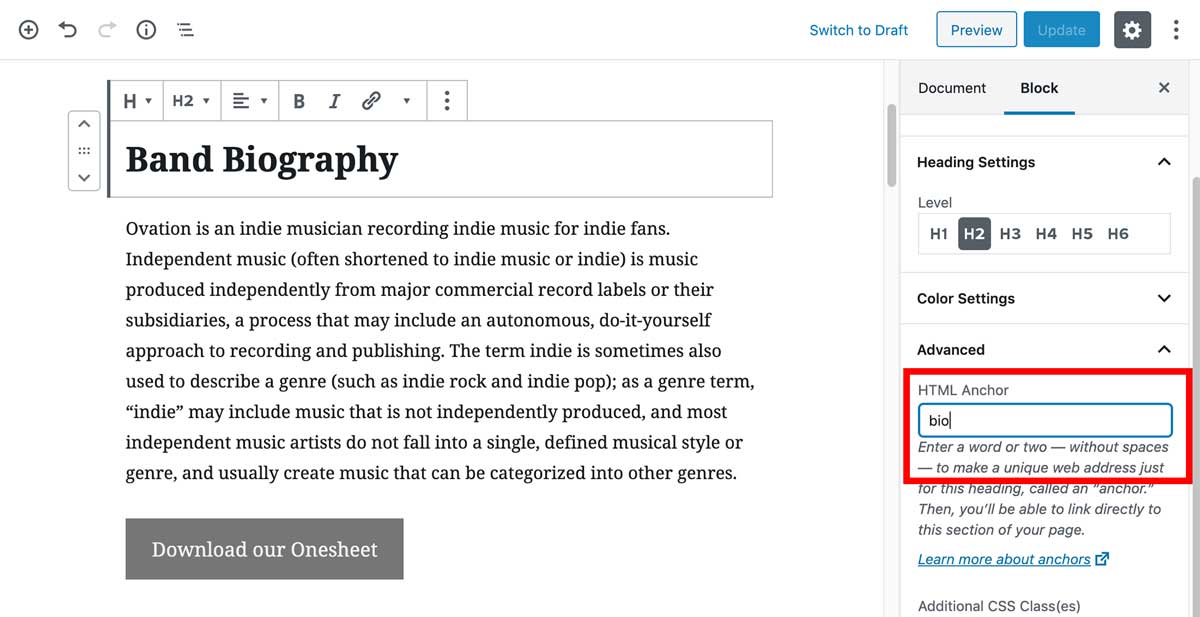
You can do the same for each of the other sections of your EPK page.
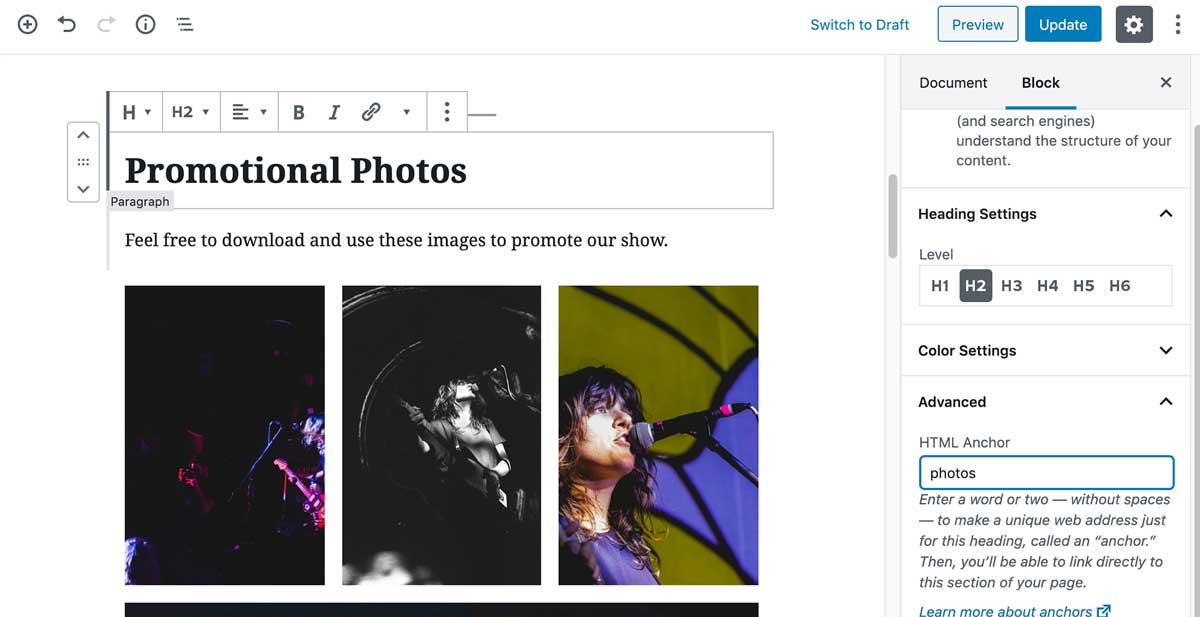
Repeat this process until you’ve added HTML anchors to each of your page sections.
Step 3: Create links for your HTML anchors at the top of the page
Now that you’ve created the anchors, it’s time to set up the links to them. The best way to organize your links is to create a list at the top of the page.
First, we’ll create a new “jump to section” heading. Below that, we’ll list each section of the page, keeping in mind the SEO factors I mentioned earlier. I’ve centered my links and added a pipe symbol as a means of separating each of the sections. You can style your links however you’d like.
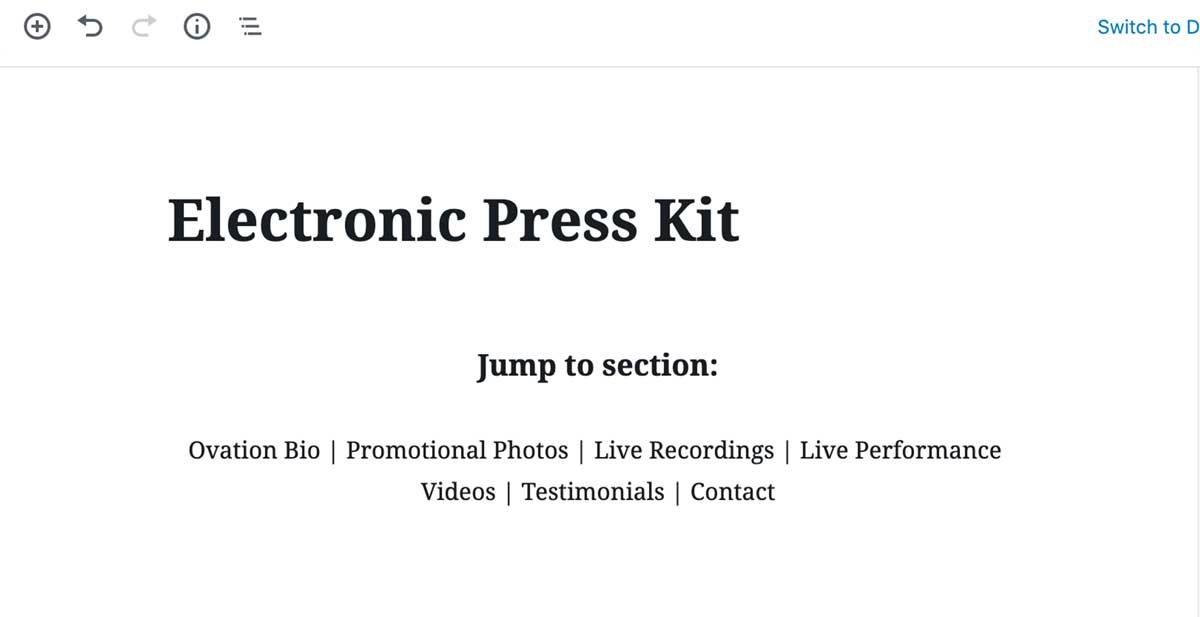
Next, we’ll add the links to each of our sections. Linking to a section on a page requires adding a hash symbol followed by the section’s anchor. For example, linking to the contact section on the EPK page would look like this:
#contact
The end result on the front end is a menu of links that allow a user to jump to a specific section of the page.
Step 4: Optional upgrades
Back to top link
If your page is really long, you may want to consider adding “back to top” links throughout. All modern browsers understand where the top of the page is, so there’s no need to add an HTML anchor for that. You simply need to add the link. At the end of each section, you could create a link that says “back to top”, and use the following for the link:
<a href="#top">Back to top<a/>
Add your anchor links to your menu
If you’re sending an EPK out for promotional purposes, you may not want to put a link to it in your menu. However, if you want visitors to find it on their own, you can add it to the main site menu. You can also add your anchor links as submenu items. Keep in mind when you are linking to an anchor from another page, you need to include the full URL to the page.
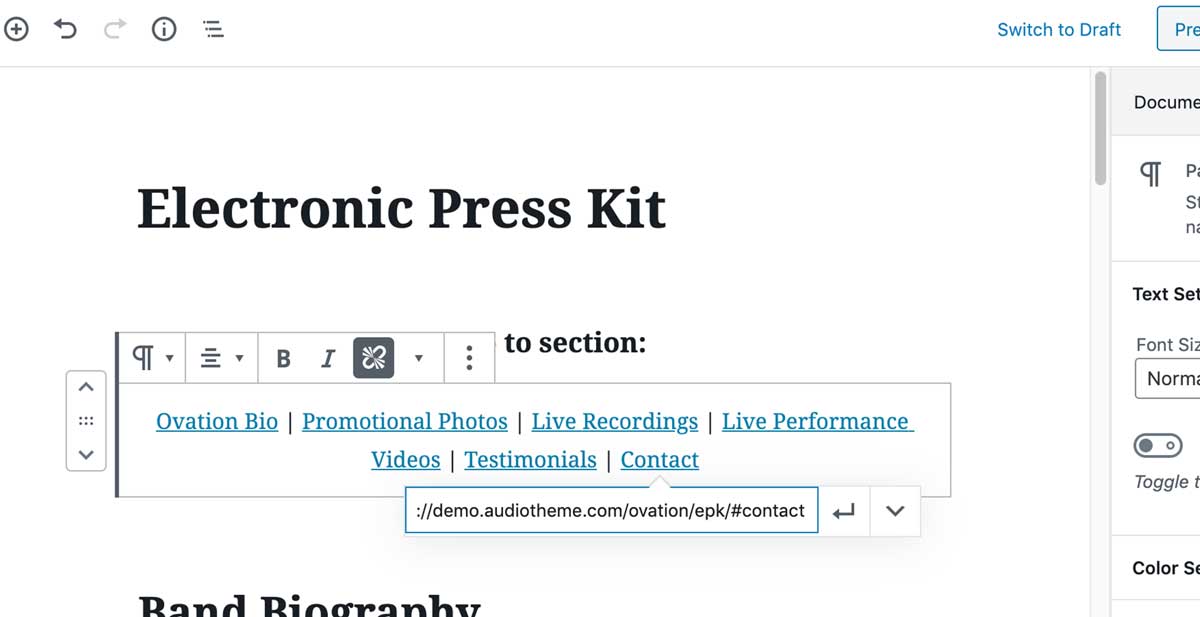
In our example, our page’s URL is https://demo.audiotheme.com/ovation/epk/, so the link to the contact section would look like this:
https://demo.audiotheme.com/ovation/epk/#contact
You can add these items to your site’s main navigation by adding custom links.
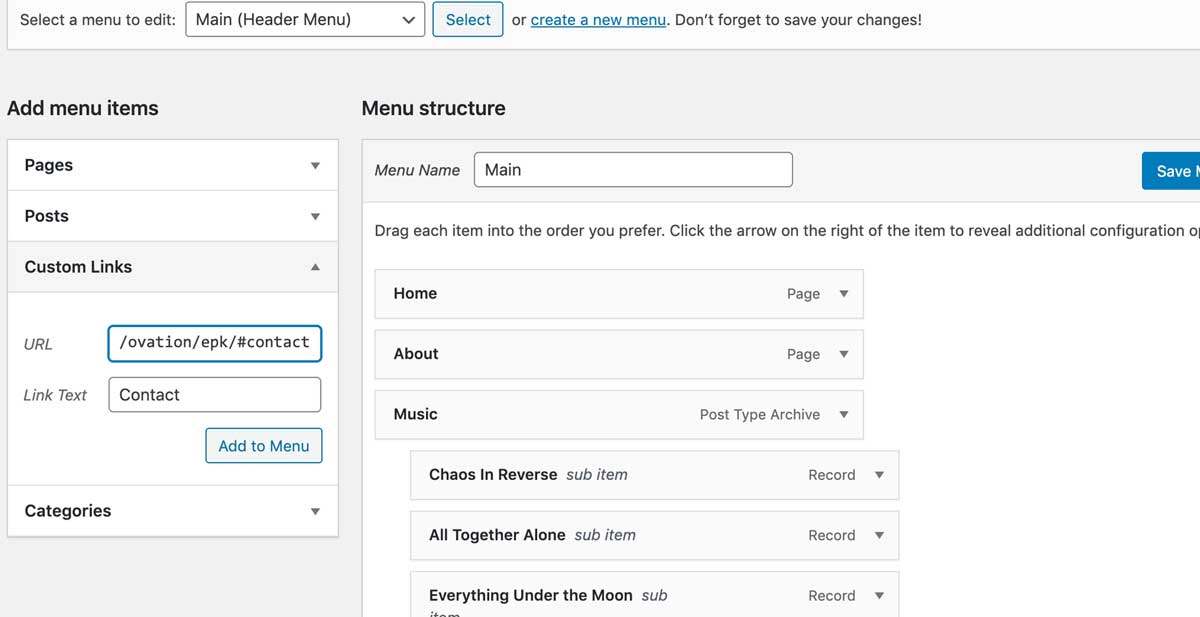
Once you’ve added all of your custom links, simply drag them underneath the main page as you would any other submenu item.
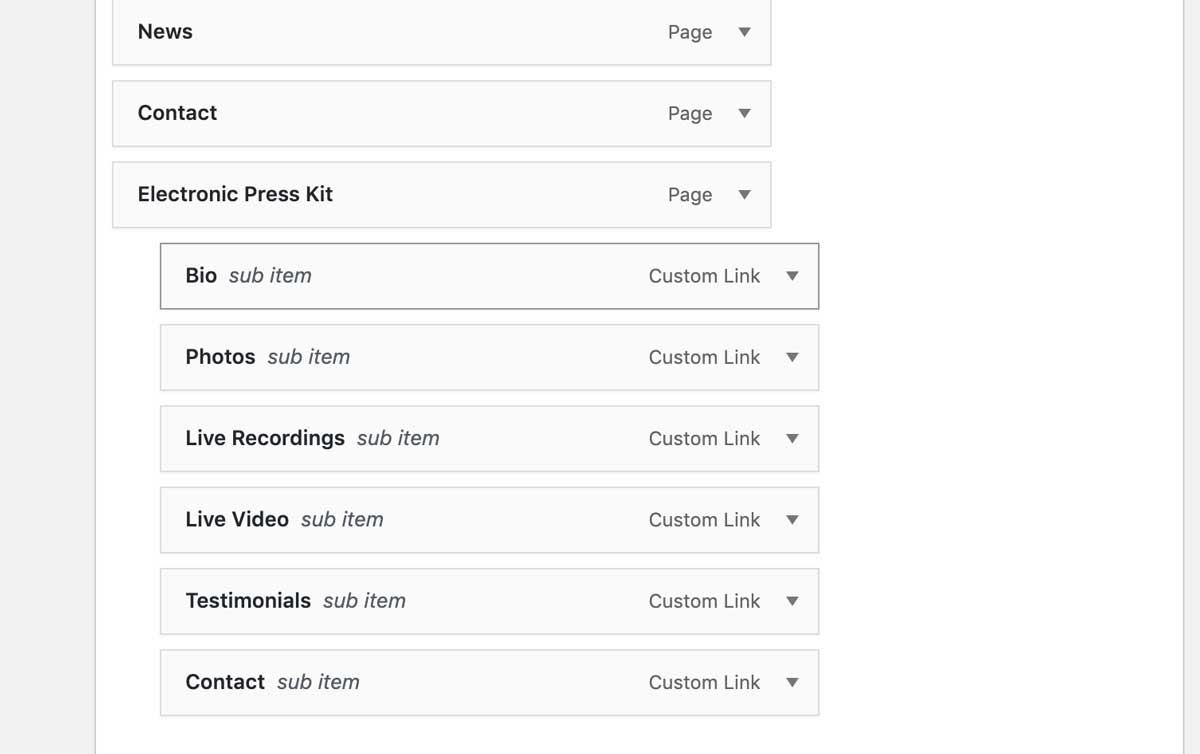
This will result in menu items that link directly to your named sections.
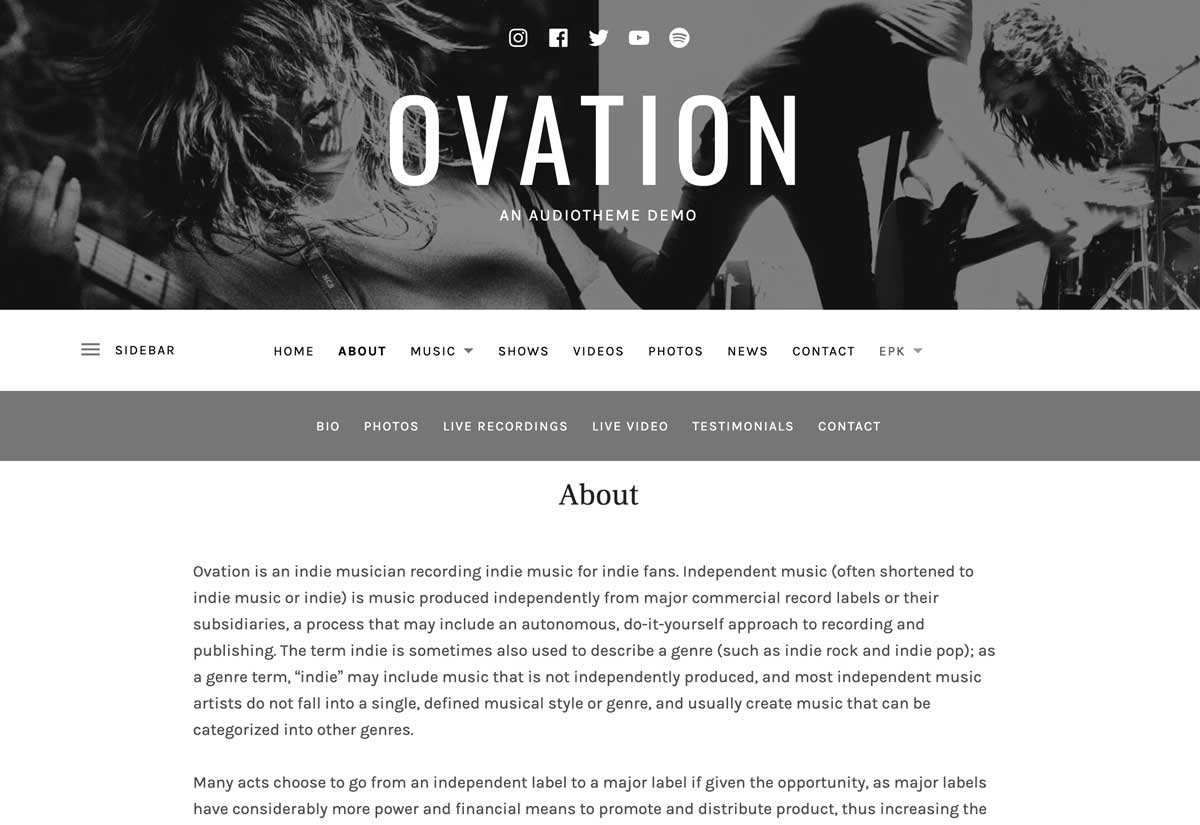
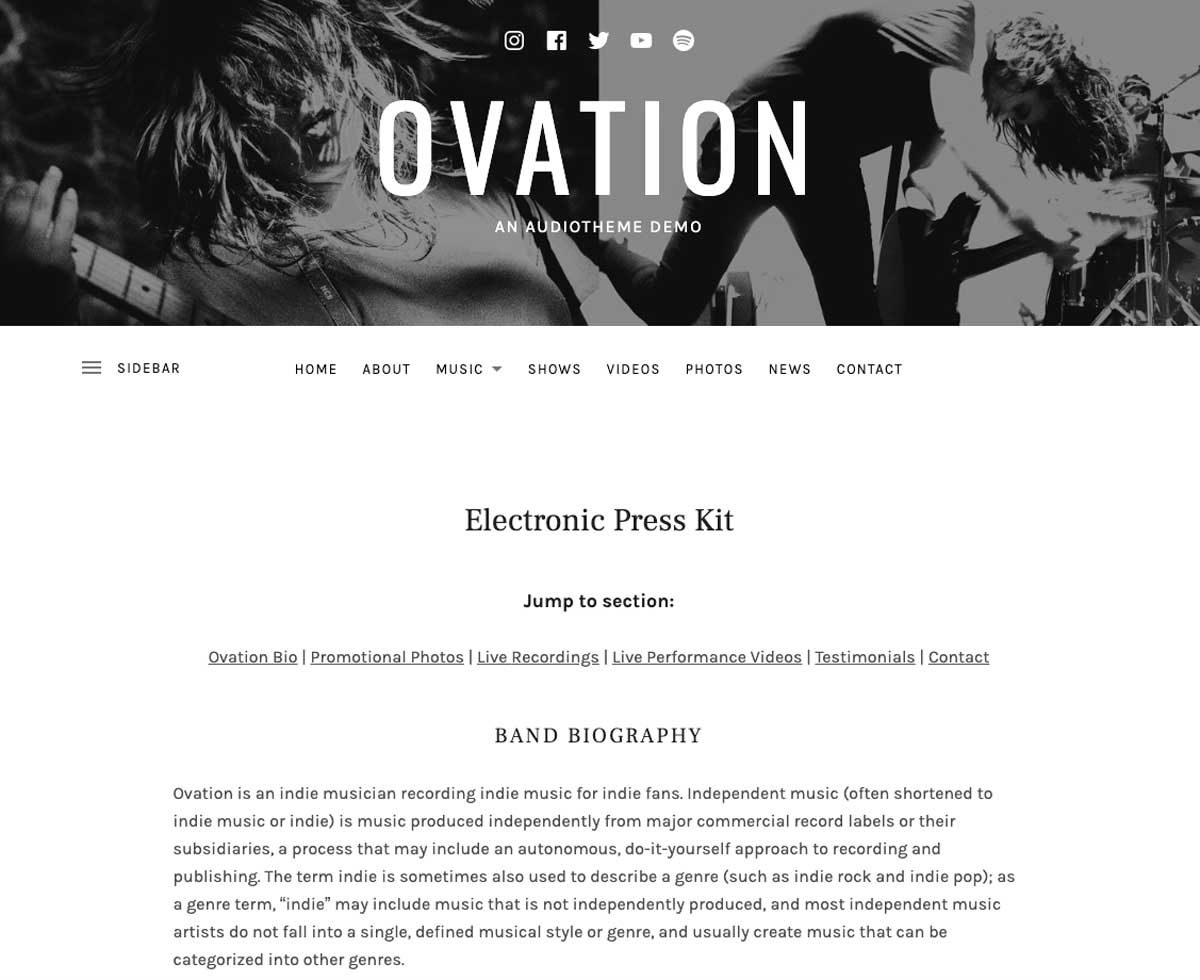
The final product
Our final result is a one-stop shop for everything important to an EPK. This setup allows us to combine relevant info into one page, but still keep it organized. It also allows us to send links directly to specific sections within a page.
Check out the end result live on our Ovation demo here.